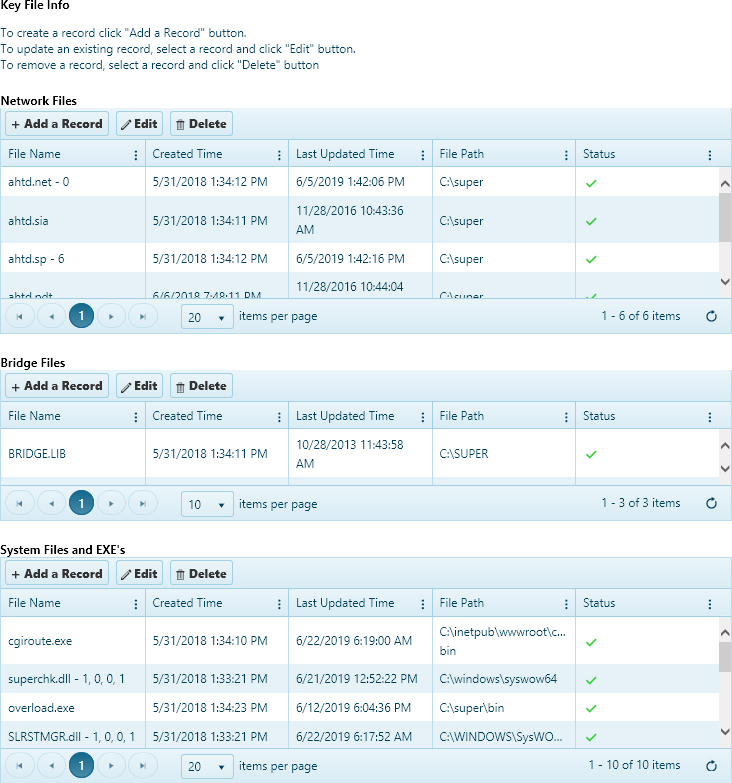
Use the Key File Info page to add, edit, and delete a collection of records classified as network, bridge, and system files.
Note: Your DB scripts are configured for a default install location, but if your application was installed in a different location, manual adjustment may be required.
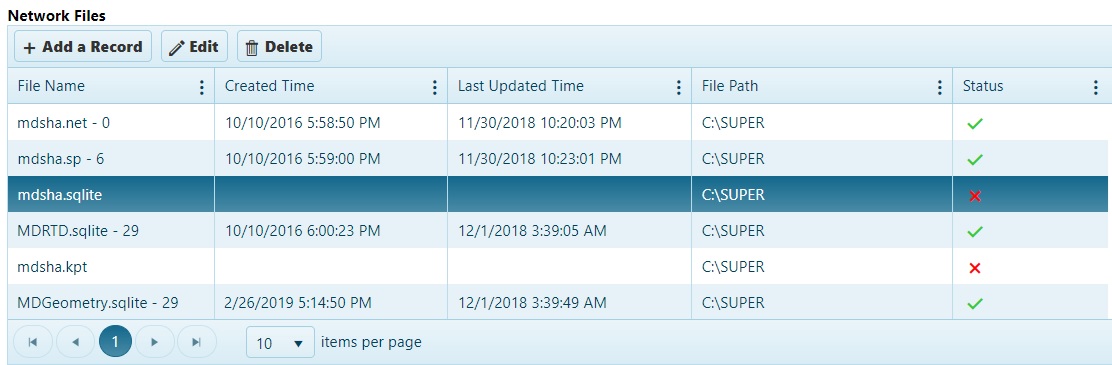
The Key File Info Page consists of three grids:
Network Files – Contain network files.
Bridge Files – Contain bridge files.
System Files and EXE’s – Contain System files and EXE’s.
Each grid has a toolbar with three buttons namely: Add a Record, Edit, Delete.
Click the Add a Record button to create a record.

Click the Edit button to update an existing record.

Click Delete to remove a record.

The grid has 5 columns:
File Name: The file name (with version if the file extension is .sqlite/.sp/.net).
Created Time: This column displays the creation time of the file.
Last Updated Time: This column displays the time at which the file was last updated.
File Path: This column displays the path of the file.
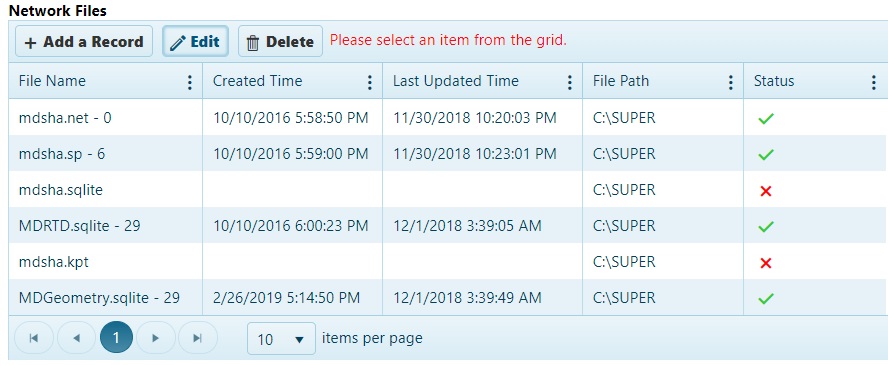
Status: The status signifies the status of the file existence.
 – indicates that the file is no longer available at the provided file path
 – indicates that the file is available at the provided file path
After Logging in, click on My Admin.
On the left-hand side, in the System Maintenance section, click on Key File Info.
Navigate to the Key File Info screen by clicking the My Admin link then choosing Key File Info from the System Maintenance pane.
Click the Add button on the grid to which you wish to add a record.
A pop-up appears.
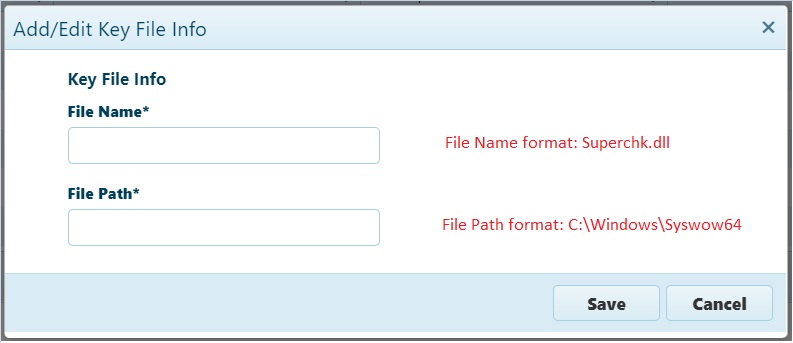
Enter File Name and File Path in the fields provided.
Click OK.
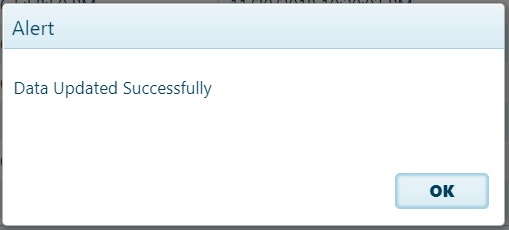
A message indicating the success of the transaction will appear.

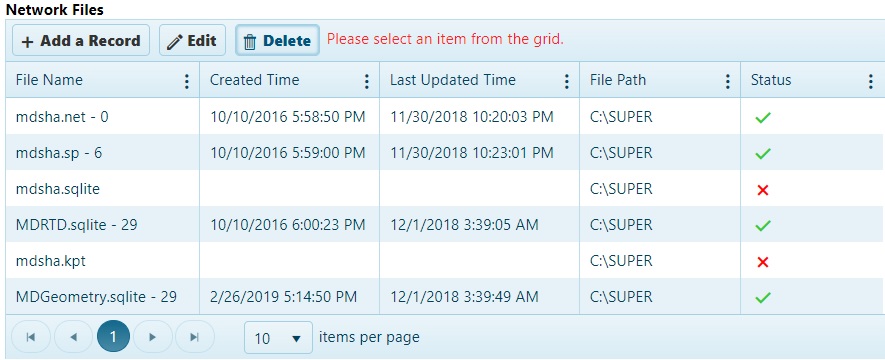
Select the record to be edited. 
Note: You must select a record to update. If you click the Edit button without choosing a record, you will receive a message in red text urging you to make a choice prior to clicking the button.
When you click the Edit button, a dialog will open.
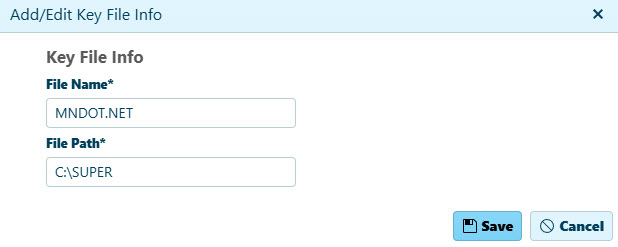
The dialog offers two fields:
The File Name* contains the name of the file.
The File Path* field contains the path of the file.
Make your changes then click Update.
A message signifying the success of the operation will appear.
Select the record you wish to remove from the table then click the Delete button.
Note: You must select a record to delete. If you click the Delete button without choosing a record, you will receive a message in red text urging you to make a choice prior to clicking the button.
When you click Delete, a confirmation pop-up will appear.
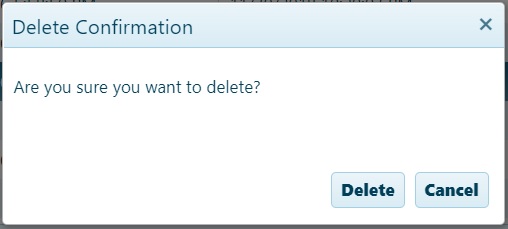
Click the Delete button on the pop-up to confirm that you wish to eliminate the selected record.
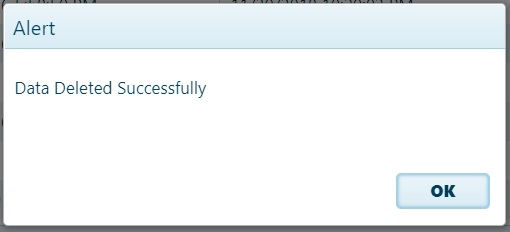
A message signifying a successful deletion will appear.
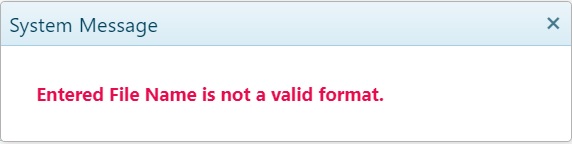
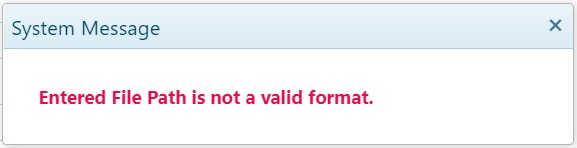
While adding/updating a record, you will get the following messages in the scenarios mentioned.
If you attempt to add duplicate record:

If you attempt to add/update wrong file name:
If you attempt to add/update wrong file path:
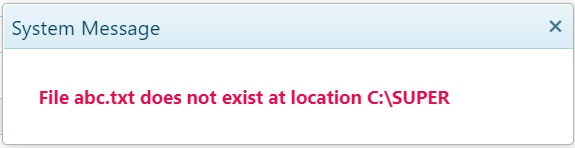
If you attempt to add/update non-existent file: